Tasmota V2 Wi-Fi Setup
Tasmota still provides a temporary wireless access point for first-time setup.
Connect the plug to power, then join the temporary Tasmota Wi-Fi network from your phone or laptop. On current Smart Hut firmware this is normally based on smarthutpm-XXXXXX, where XXXXXX is derived from the plug MAC address. Older firmware may show a tasmota or smarthutplug network instead.
If your device does not automatically open the setup portal, browse to http://192.168.4.1.
On the v2 Wi-Fi page:
- Select one of the detected Wi-Fi networks, or click
Scan for all WiFi Networks - Enter your Wi-Fi password
- Optionally fill in
WiFi Network 2and its password as a fallback network - Leave
Hostnameas-is unless you specifically need to rename it - Click
Save
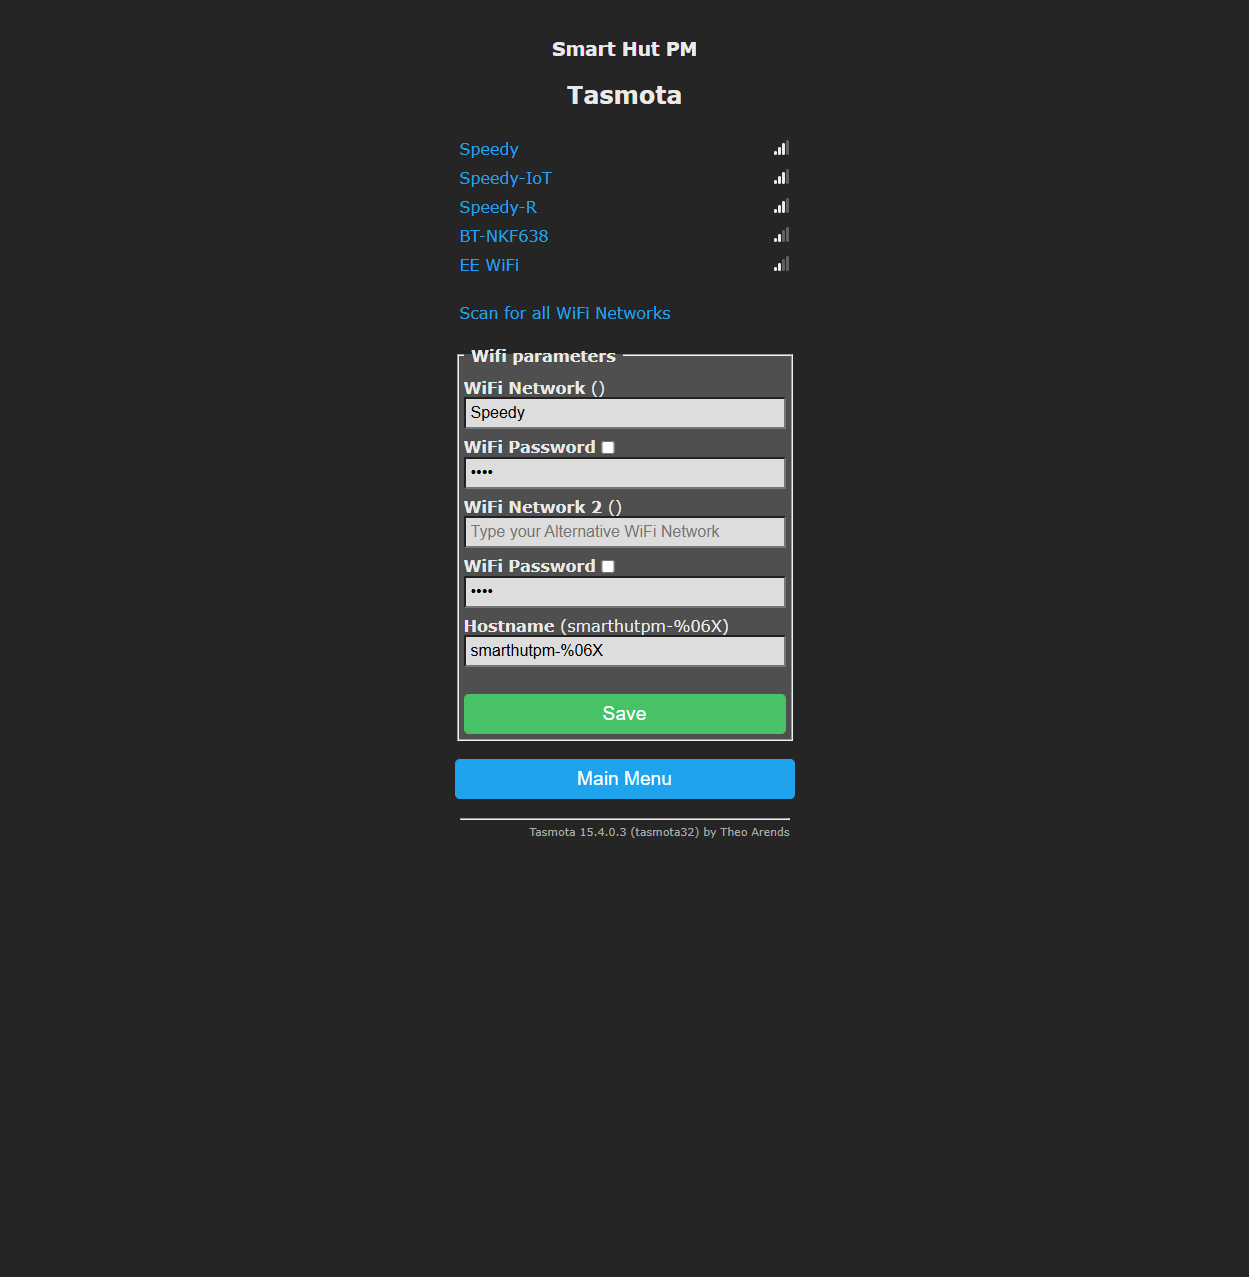
After saving, the plug will connect to your network and the temporary Tasmota access point will disappear.
The plug's default hostname is smarthutpm-XXXXXX. Check your router, DHCP leases, or network scanner if you need to find its IP address after setup.
If the SSID or password is wrong, the plug will return to the Wi-Fi page so you can try again.
Reopen Wi-Fi Setup
If the plug can no longer connect to Wi-Fi, press the physical button three times to enter Wi-Fi configuration mode, then reconnect to the temporary access point and update the Wi-Fi details.